When I got into photography, I slowly stepped away from heavy processing. I believe it's best to get it right on the camera or at least closest to what the image should be. Then use post-processing on whatever the camera just can't do. Keeping this in mind, I began to forget about curves and layering on GIMP. Most editing I do are done with Digital Photo Professional (default software provided by Canon). Just a few exposure/shadow/highlights/cropping was all I needed. It has been like this for about a year now.
I've mentioned earlier that I'm now dabbling with Photoshop. I admit it's a powerful software. Too good, in fact, that I get carried away sometimes, and over-cook my photos. Something that hasn't happened to me for a while. I feel like a kid with a new toy. Something to abuse. But let me go back to when I started.
I kept talking about the "transition" from a GIMP user (here and everywhere else). It really was challenging. Having used to specific key-strokes from GIMP then relearning different ones on Photoshop is already a high hurdle to jump over. During the earlier times, I was always frustrated on how it takes so many clicks just to paint a single straight line. It just wasn't this complicated in GIMP. The only thing that eases transition is the terminology. At least "layers" in GIMP is also called "layers" in Photoshop. I went through some tutorials to get to know Photoshop better but the lot of them started to confuse me even more.
So I decided, I'd start doing the basics I've learned from GIMP and replicate them on Photoshop. At least, I think, I know the effect I want to make. I know the steps I have to take. All I need is to familiarize myself on producing a similar image through Photoshop.
How about some Black and White? It's one of the most basic conversions that most cameras have this processing built-in.
 |
| Little Girl I find that a flat B&W with this image is boring. It doesn't highlight what I really want to focus into and I like the blue background. So I took a step ahead and done selective black and white. |
 |
| Little Girl in B&W Or how about a little bit more extreme? If I want to feature the subject, I might as well go all the way. I'm sure other photographers will point out that I could do this on camera by using my flash. But the time I took this photo, I didn't have my flash with me and it's broad daylight. And to be honest, this is just as good as I want it to be. |
Or how about some layers? "Layers" is commonly mentioned when it comes to digital manipulation. Be it heavy processing or just basic stuff. It's pretty basic application. But layers also covers many techniques. That's why there's so many extra terms attached to it.
 |
| Not So Obvious Sometimes they call it High Dynamic Range. The camera can not see as much as the human eye can, sometimes. Without using layers, I could only have 2 images. One, if I want to see the trees and myself on the reflection, the sun will be so large, there won't be clouds in there. The board will be too bright for some shadows and details as well. Two, the clouds will be there, but you won't see me, nor the trees. The board might look interesting but the shadows will cover a lot of the details. With layers, I get to show the elements I want to show, without much compensation. |
Moving on to the more advanced, I wanted to learn more about Dodging/Burning. It's one of the new techniques I played around in GIMP before I started photography. Here on Photoshop, I consider it very new. I'm not that good, but at least I'm learning more.
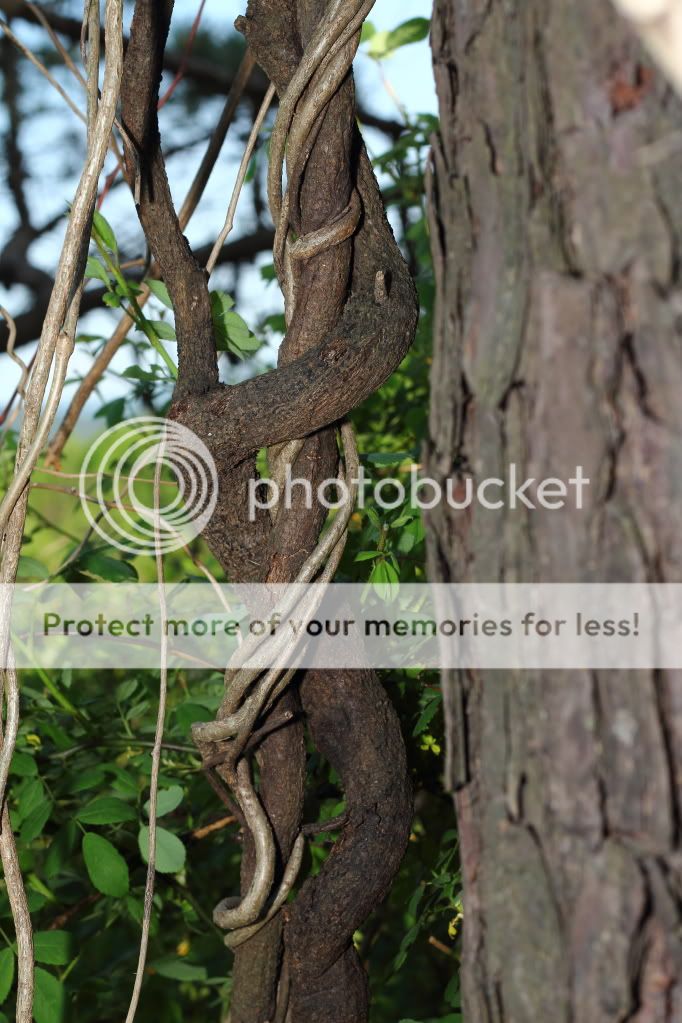 |
| Adam and Ever (original) This is how it came out of the camera. To me, I immediately see the figure I want to show. But I can tell, not a lot of people will find them obvious. |
 |
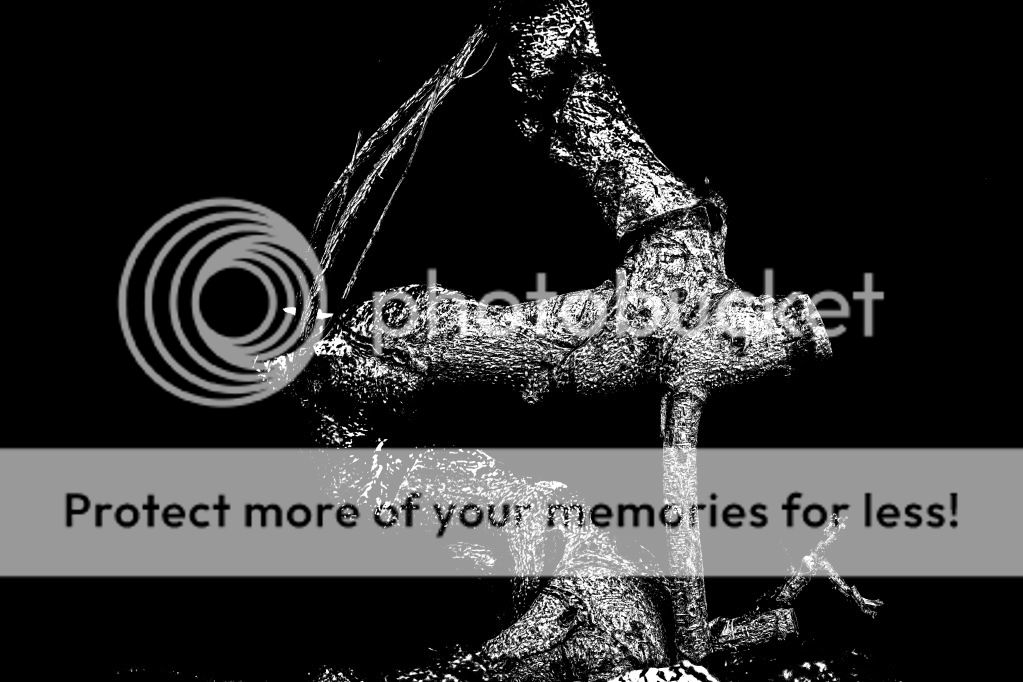
| Adam and Eve And this is my final version. True, it looks over-processed and there are so many technical flaws on both photography and post-processing. But I think I got the image quite more clear than the original. Using dodge/burn, I get to highlight some features that make the vines look more like body parts. |
And now, some combinations. I got other tricks up my sleeve like fixing white balance and what not. But really, it's not too complicated. But this next picture challenged me a lot. It's not about just slapping whatever effects I could come up with. It's more about the balance. Sure, the result is obviously over-processed. But was the work justified?
 |
| Eerie (Original) The time I took this shot, I already knew what I want it to look like. I had an example image on my mind of what it should be. How it should feel. Once I uploaded this on my computer, I know I want it to look ghostly and such. Upon closer look, I have ideas of what to do with which part. |
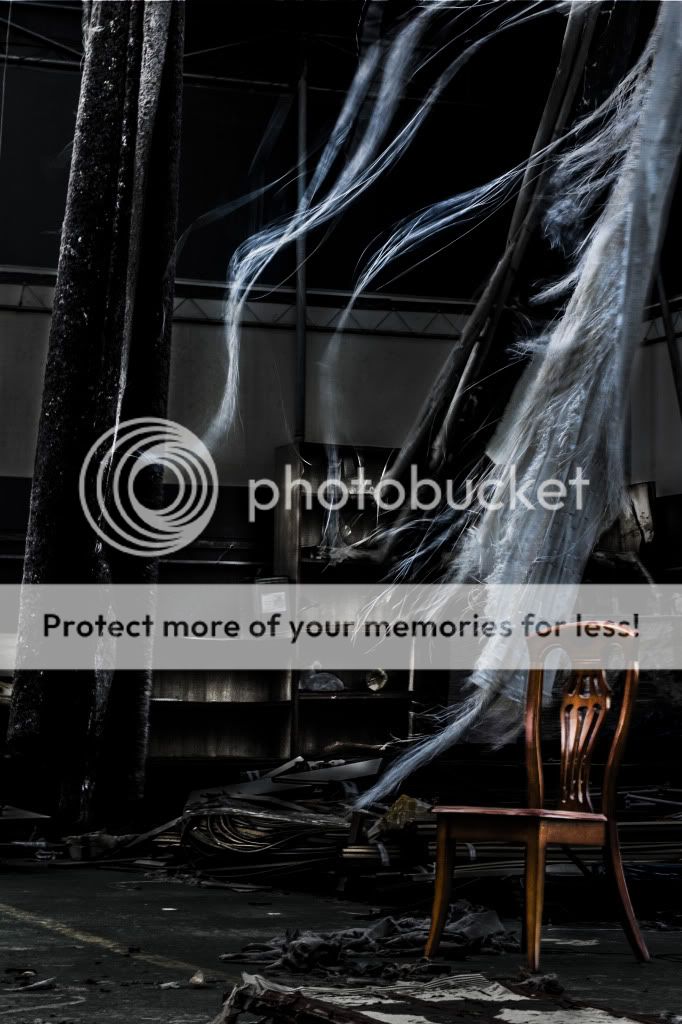 |
| Eerie or Else (final image) Again it's all about balance. I've done many tries with this and asked for help from other people. I slapped the techniques that I know and it was fun yet most challenging. Thinking about it, it's really simple on paper. Darkening some parts, brightening others, saturating, desaturating, dodging, burning, layering, all are simple procedures when done in one go. But to combine all those makes it a bit more complicated. And again, the balance. That's the key. It's not just adding or subtracting stuff. It's making sure the amount added or taken away is just right. To me, right now, it's just right. |
And now it's time for the fun part! There are many other things I think I can do with GIMP or Photoshop besides these basic stuff. I simply ditched those tricks when I got into photography. To me, it often ruins the photo when there's just too much "effects" in an image. But this blog is not about that. It's about getting myself more comfortable with Photoshop. So I dabbled a bit more and to my surprise, things are getting easier.
 |
| The Rust From my other blog, I took pictures of a very rusty wall. I used some other Photoshop filters enhancing the texture and light. But I had another idea. |
 |
| The Planet The entirety of this image came from the rust. It's just a little play of distortions and layers. One is just a copy of the other. Nothing but a little execution of some effects done by editing. |
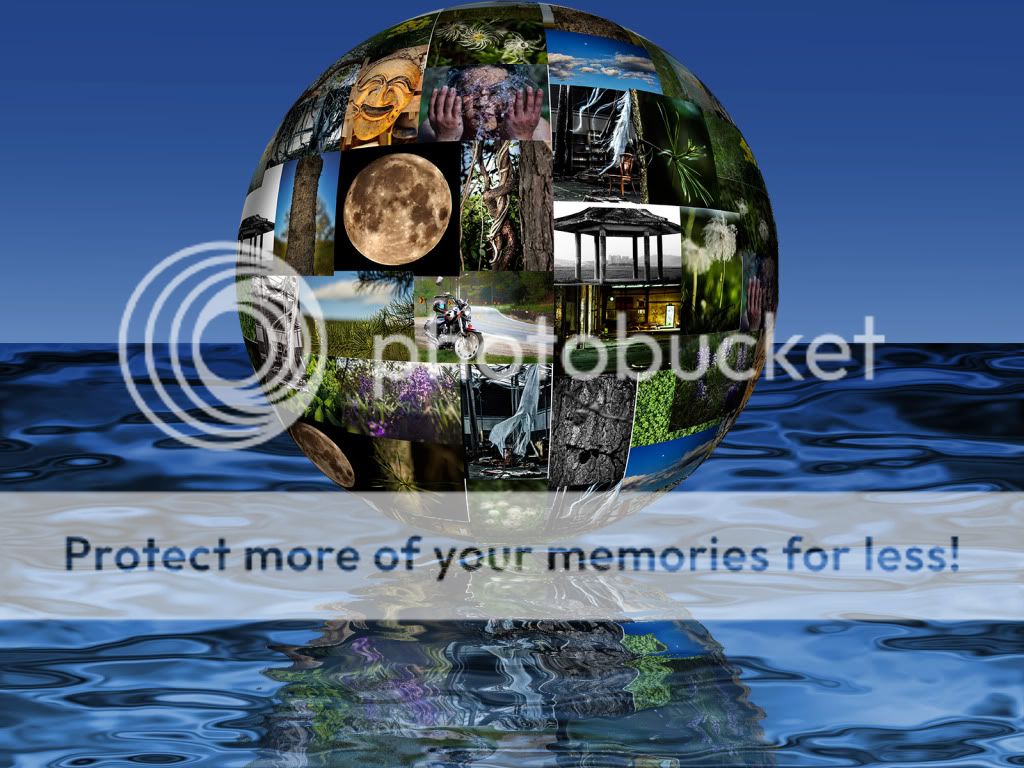 |
| The Globe I thought I'd plug just some of my favorite photos and put them on one image. Albums seems a bit boring and not so challenging. I'm using total effects, after all. So why not push it? So here you go with a little water and a sphere comprised of pictures I liked. I might even keep doing this for my favorites of the year or something. Maybe. |
But is that it? Well, I do know a couple more things from GIMP alone and I surely can do them in Photoshop now. The thing is, it's getting addicting. Effects after effects and I continually ruin a lot of my photographs just for effects and "fun factor." Personally, I frown on these procedures where someone copies a partial sky over another image. Or a tree. Or just something like that. I feel it's not so genuine. It's not photography. And on that note, I also am not fond of manipulating people's figure too much. Maybe a little smoothening of the skin. Or getting rid of that blasted acne. But that's as far as I'm willing to go. It's not photography anymore if I have to change someone's weight. Or attach an arm to someone without one.
And as for being addicted, I noticed it. And it's annoying. I still tend to over texturize some parts of my photos. Or over sharpen it. But I'm new to the world of photography. I still got a lot to learn. And one thing I desperately need right now is to find the right balance on post-processing.
Be that as it may, I'm still glad I'm coping up with Photoshop. I'll say it again, the transition is difficult. But it only takes some practice.
No comments:
Post a Comment